
OAT BROWN BUTTER CHOCOLATE COOKIES
Notes: If you love oatmeal cookies with chocolate then you’ve gotta try a brown butter version. I decided to use oat flour in these instead of rolled oats because I wanted a smooth texture. I also add a nice dose of cinnamon and it deepens that comforting, caramel flavor, while settling in the background. There’s not much more to say other than these cookies satisfy the eyes and the stomach.
Makes 11-12 cookies.
Prep and bake time: ~45 mins; Waiting time: 1-24 hrs.
The ingredients are all measured in grams. And if you don’t yet have a kitchen scale for baking take this as your sign to get one. It makes baking accurate and reproducible. I have and use the OXO Good Grips 11 1b stainless steel digital kitchen scale (not sponsored) because it’s a great combination of quality and price point.
Special Equipment:
Conventional ice cream scoop (65 mm)
Linked are the ones I have (not sponsored). They are easy to clean and don’t warp.
Optional silicone air mats (can also use parchment paper)
Optional piping bag if you want to decorate the tops with dark chocolate
Ingredients:
Brown butter cookie dough
226 g, two sticks, unsalted butter (at least 85% butter fat)
140 g AP flour
85 g oat flour
1 teaspoon salt; I used pink Himalayan, can also use kosher.
1 and 1/2 teaspoons cinnamon powder
1 teaspoon baking soda
155 g dark brown sugar
55 g granulated sugar
2 teaspoons vanilla extract
2 eggs, room temperature
170 g dark chocolate (recommend 70% cacao)
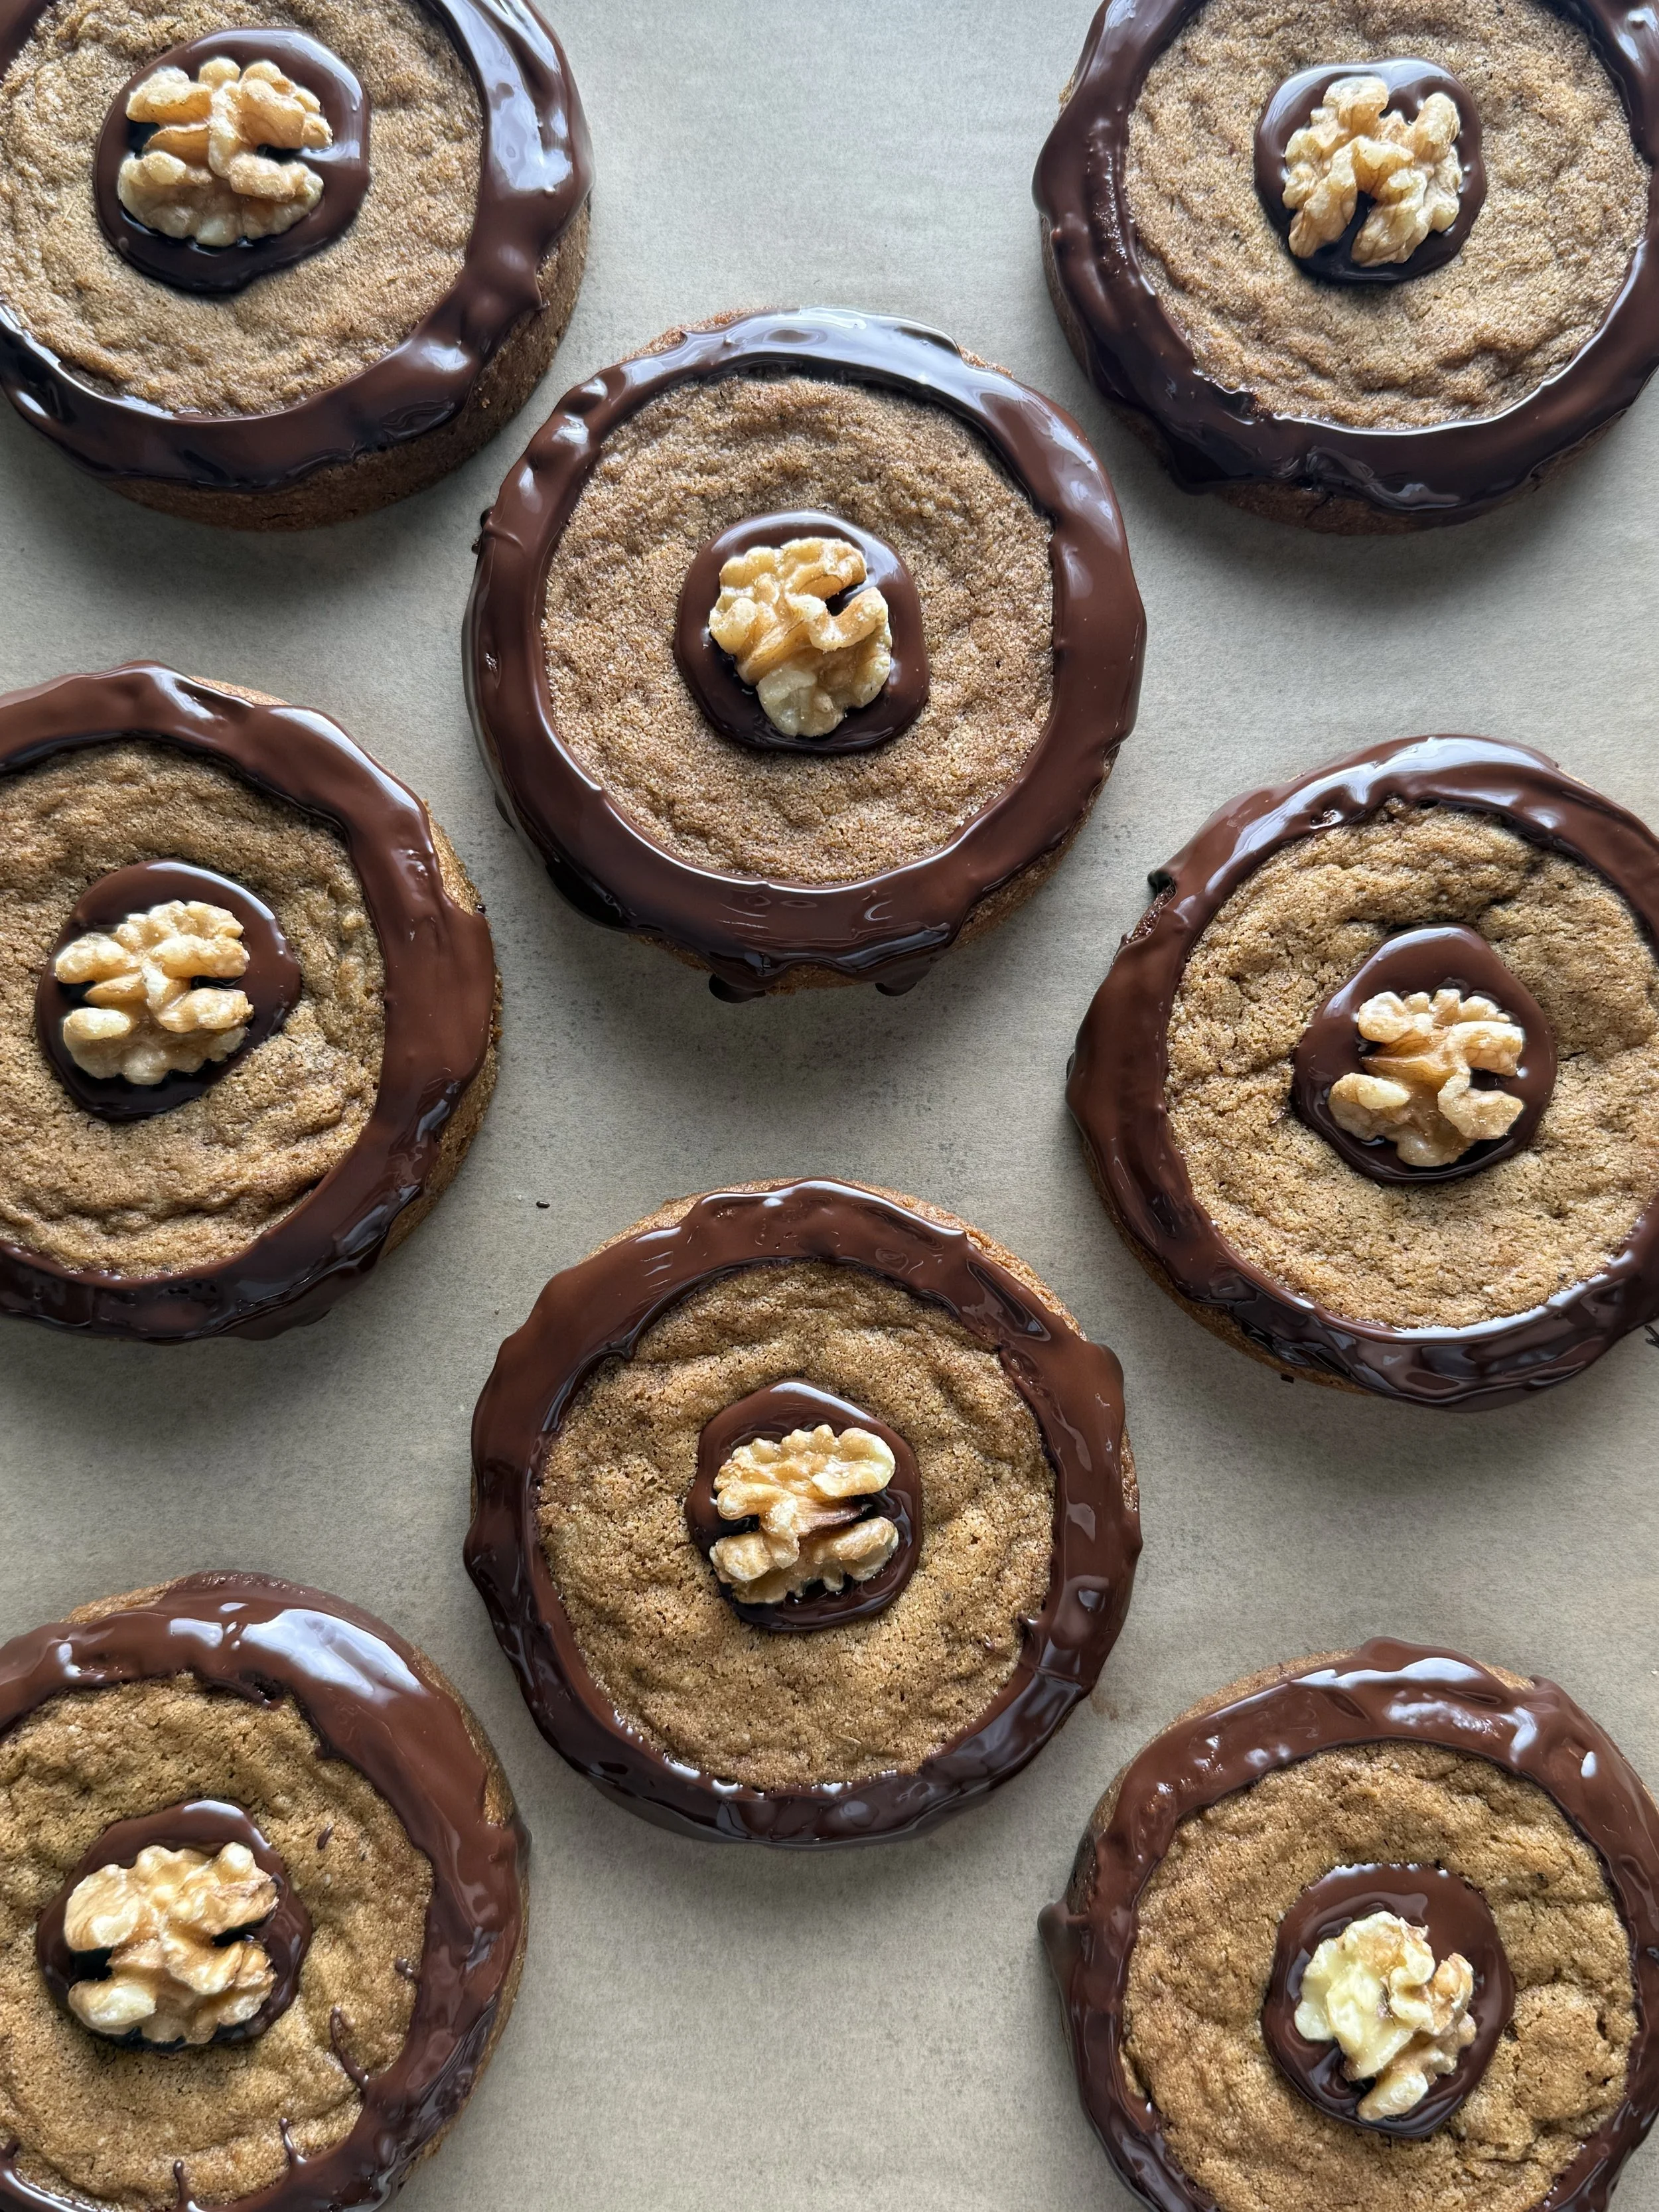
Optional walnuts for garnish
Directions:
Add the butter to a small saucepan over medium heat. Stir to melt, then continue to stir as it goes from bright yellow, to bubbly. Next, it will turn foamy which is when the browning process starts. Keep stirring and watch the butter as it quickly darkens to a deep amber. Remove from the heat and transfer into a glass measuring cup or small glass bowl. Set the butter aside to cool to room temp (can also refrigerate to accelerate cooling).
In a medium mixing bowl whisk together the oat flour, AP flour, salt, and baking soda and set aside.
In a large mixing bowl add the sugars, cinnamon powder, and once the brown butter has cooled pour it in. Thoroughly whisk to combine. Then add the eggs and vanilla and thoroughly whisk.
Pour in the dry ingredients. *If you don’t want to decorate the tops with chocolate later this would be a good time to add the chocolate as chopped pieces or chips before mixing. Use a rubber spatula to fold the dough until just combined (i.e., no visible streaks of flour). The dough should look shiny and smooth.
Refrigerate the cookie dough uncovered for at least 1 hour (4 hrs is even better, and overnight is best).
When ready to bake preheat oven to 350 F.
After the dough has chilled use an ice cream scoop portion the dough onto baking sheets lined silicone air mats or parchment paper. Space the cookies at least 2 inches apart. And optionally center each cookie in a tart ring mold prior to baking.
*If you use ring molds it’s important to make sure the cookie dollops are centered otherwise you make get slightly lopsided cookies. Make sure the rings don’t slide when you place the sheet in the oven, and if they do, recenter them.
Bake for 12-14 minutes (I baked mine for 12 mins) or until the cookies have spread and the edges are golden and crinkly.
If you used tart ring molds you need to let the cookies cool completely before attempting to remove them otherwise you will likely break a few. Also, if you decide to decorate the tops with chocolate you need to let them cool before you do so.
Melt the chocolate using the microwave tempering method: Chop chocolate into pea sized pieces and reserve about 20-30 g to “seed” the chocolate after melting. In a small mixing bowl microwave the rest for 30 seconds, thoroughly mix, then another 30 seconds and a thorough mix, and another 20 seconds (if needed) and mix until just melted and smooth. Chop your reserved chocolate into tiny slivers and add to the melted chocolate and mix until smooth. Transfer to a piping bag to decorate the tops of your cookies. Decorate like I did or however you wish (just zigzagging across would also look good).
Optionally garnish with walnuts before the chocolate has set. Otherwise enjoy!
They keep super well for days. I refrigerate and eat them straight out of the fridge and they’re still chewy (not hard).